
This is part of a series of 'Getting started' posts to help you make the most of your Portalis Customer Portal system.
If you are not already a Portalis customer, get started for free.
Tip #3 - The Configuration section
Located in the Admin Portal, the Configuration section enables you to create and control many of the global settings for your Portalis instance. By global settings we mean items which are common across all of your customer portals.
What's in the Configuration section? We'll go through each of the tabs below:
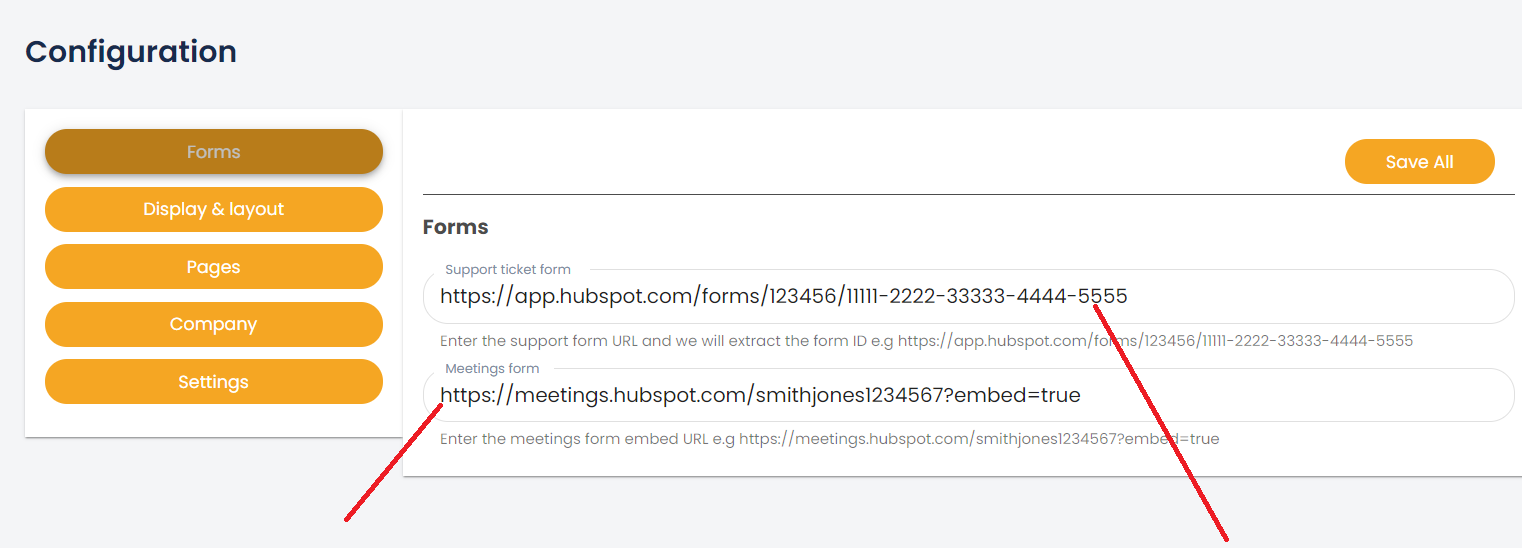
1. Forms
- Support ticket form - from HubSpot. Portalis has the most advanced Support Ticket tool for HubSpot available today. Add the link to your HubSpot Support ticket form to Portalis for seemless integration. We will write more about this feature in other posts.
- HubSpot Meeting Scheduler - Portalis enables your Contacts (basic users) to book meetings into team or individual calendar directly from the Customer Portal. Simply add the HubSpot meeting link URL into Form field as advised on screen (below).
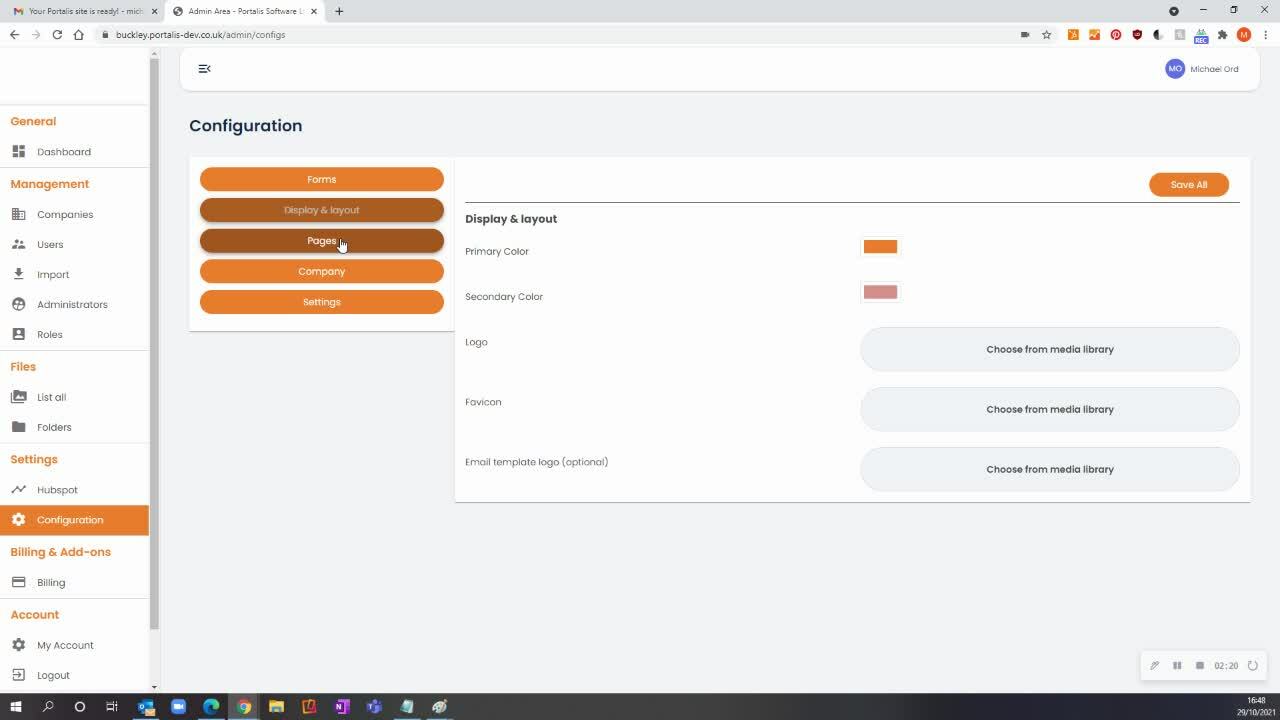
2. Display & Layout
Add your company logo, change the primary/secondary colours and email header logo to really bring your Customer Portal to life!
Branding is important. This is is the home for your customers, throughout their lifecycle, so a consistent look and feel across all of your Customer Portals only adds value.
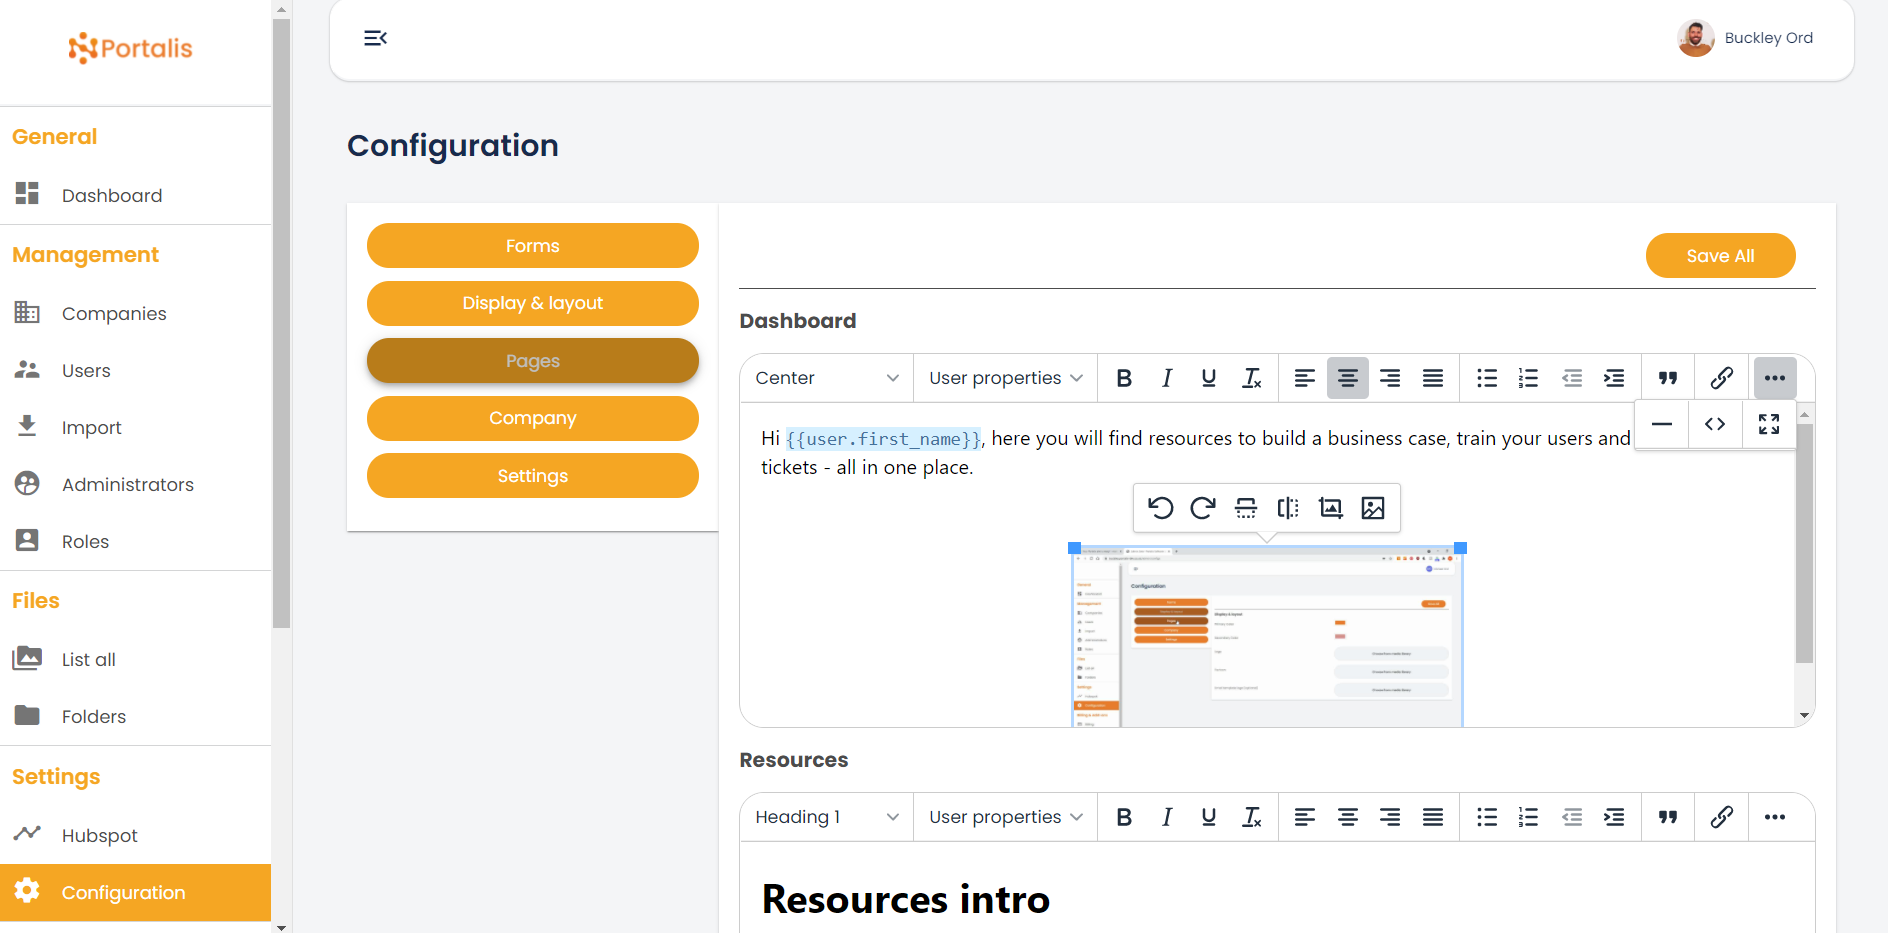
3. Pages
As well as logos and colours, Portalis enables you to edit the on page content of your Customer Portals. This includes full text editor features, alongside 'User properties' such as first_name, last_name and company_name to provide an automated, tailored experience.
Which pages are editable?
- Dashboard
- Resources
- Contacts
- Project
- Support
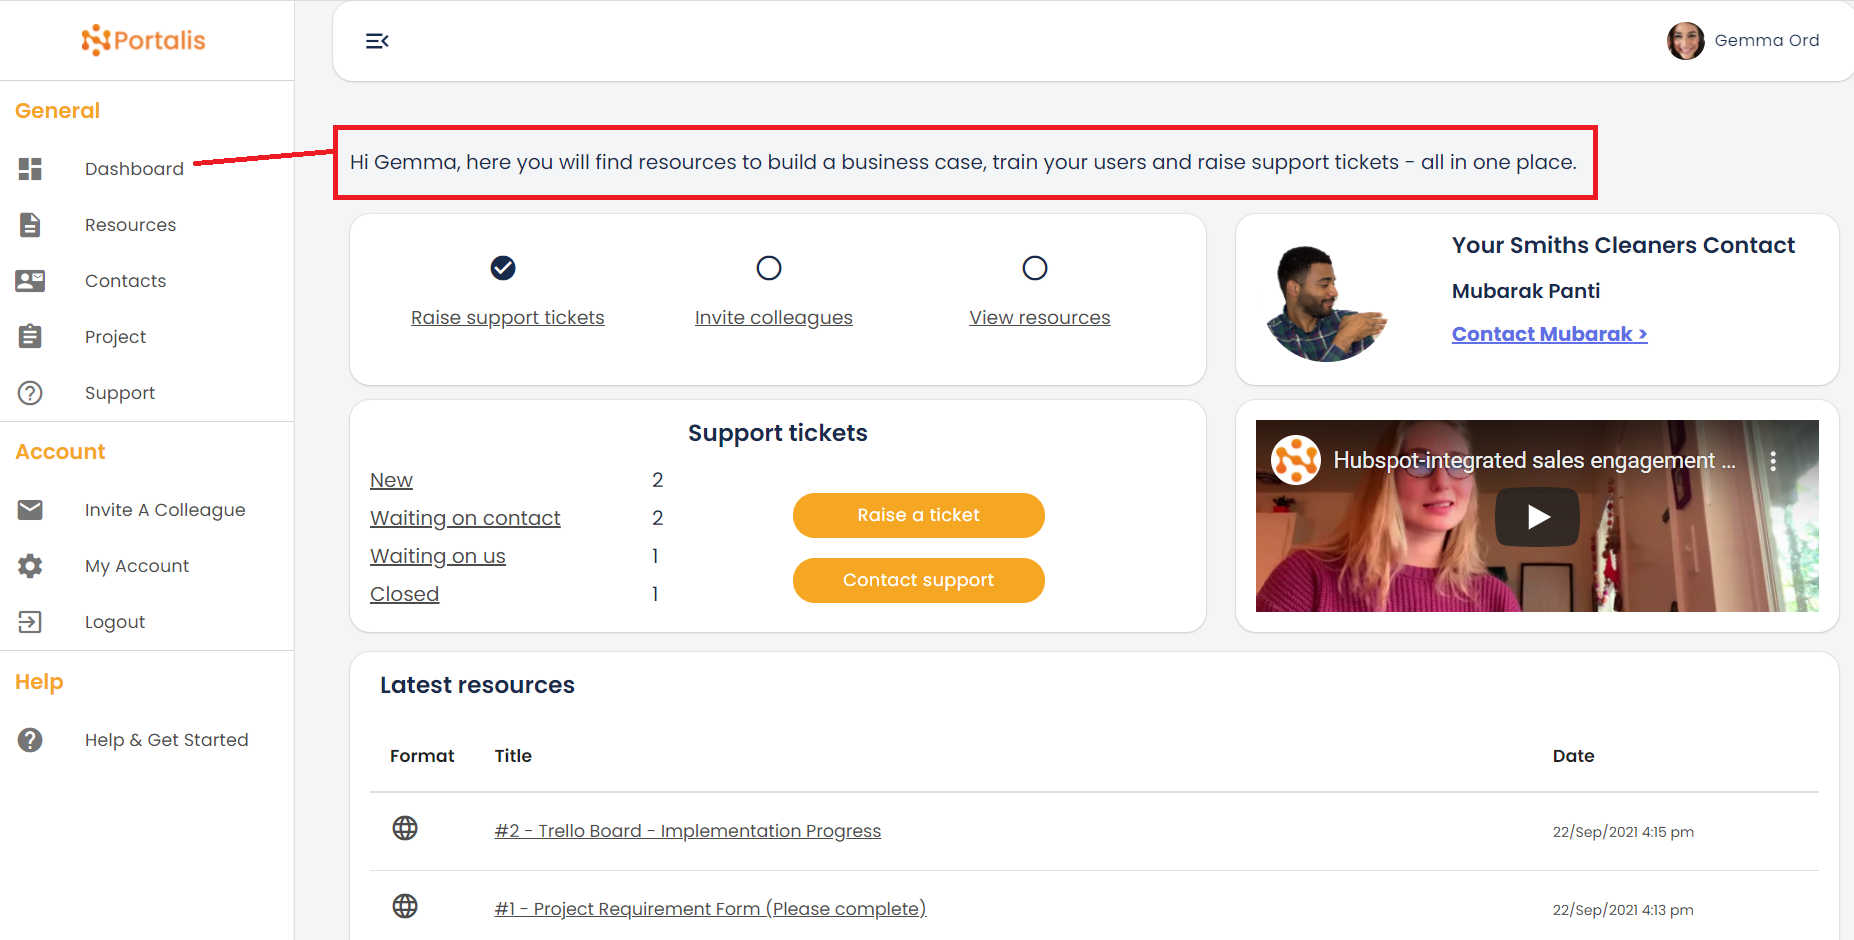
Customer Portal, Dashboard page - 'Contact' user view:
Customer Portal, Project page - 'Contact' user view:
With the Project page, you have full creative control to add any content, embeddable forms / calculators and or links to 3rd party tools such as Trello, Asana or E-commerce stores. Think of this as marketing and cross-promotion to a captive audience:
"One big surprise when we first launched Portalis is that people came to raise a support ticket, and they dwelled in the portal for 8-10 minutes consuming other content and learning about services that perhaps they previously didnt know existed"
Michael Ord, Marketing Director, Qualsys Ltd.

Customer Portal - Configuration section, Pages tab - Admin view:
To edit Customer Portal content, simply go to Pages and use scroll to the section which corresponds to the Page you want to edit. Dont forget to 'Save All' - the button is at the top right hand side.
4. Company
Portalis benefits from an integration with your 'Companies' data in HubSpot. Your 'Licensed Users' can create a Customer Portal for each of your Customers/3rd parties/Companies and their people ('Contact' users).
The advantage here is that you may be engaged with, say, two stakeholders from a company but want to encourage them to invite additional people to access their Customer Portal. For example they may invite the CEO or CFO to view commercial proposals. Or other members of the decision making unit (DMU) who you may not have access to.
With this in mind, the 'Company' tab in the Configuration section allows you to set a maximum number of Basic users that can be invited or added each Customer Portal.
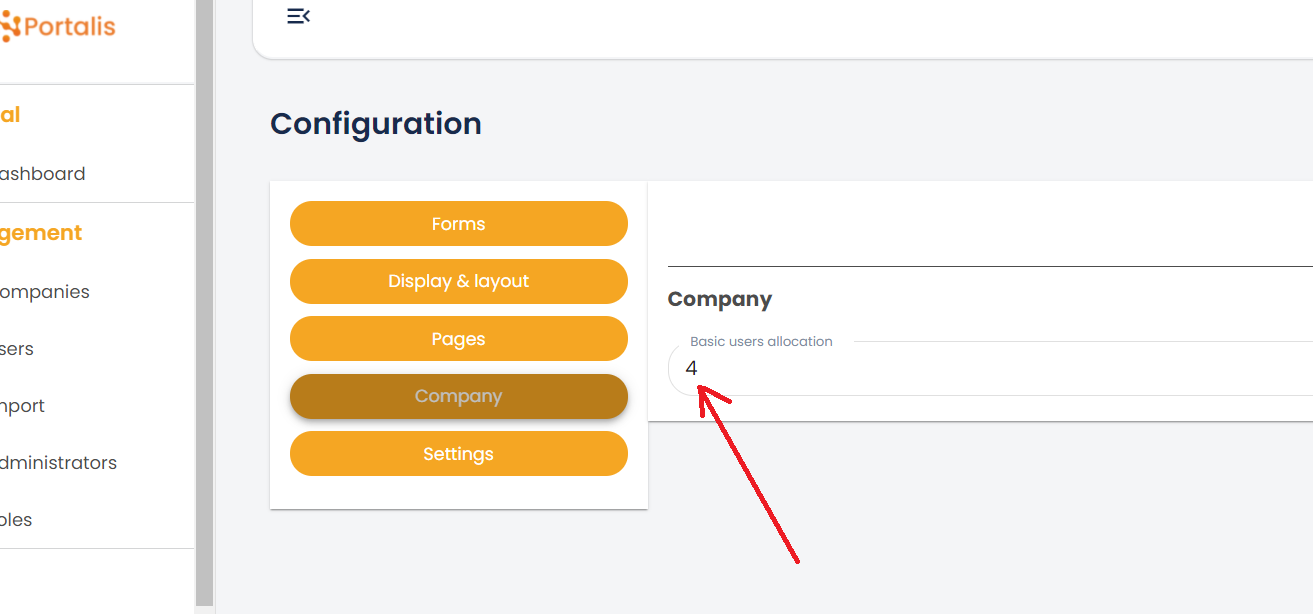
For example 4 x Contact users for each Customer Portal. Basic Users can be given different Role titles within Portalis to reflect their Job Title or Role on the project (such as Sponsor, Champion, Technical Lead etc)
Note: this number can be amended on a Company by Company basis in the 'Edit Company' section.
5. Settings
This sections shows the HubSpot portal ID that is connected to your Portalis instance, plus allows you to add/edit the email addresses who will recieve automated system alerts from Portalis (such as new user requests).
Watch the overview video (5:45mins)
What to do next?
- Log into your Portalis Admin Portal - https://[YOURCOMPANYNAME].portalis.io/admin/login
- Navigate to the Configuration page, under 'Settings' and get started!