
This is part of a series of 'Getting started' posts to help you make the most of your Portalis Customer Portal system.
If you are not already a Portalis customer, register for a Free Forever plan here.
Tip#6 Use the Media Library
Located in the Admin Portal, the Media Library enables you to upload, manage and deploy sales, marketing and customer success content across all of your Portalis customer portals.
In this post:
- What is the Media Library?
- How to find the Media Library in Portalis?
- Step-by-step guide to importing content to the Media Library
- Add Media Library content into your Customer Portal(s)
- FAQs & Troubleshooting
1. What is the Media Library?
In a nutshell:
The Media Library is the centralised home for all content that is uploaded to Portalis. This makes it easy to add content once, then apply it to multiple Portalis without the need for it to be uploaded multipled times.
Custom folders can be created to make storing and finding content even easier.
Example User Cases:
- Upload Marketing Materials such as Datasheets & case studies & promotional videos (storage space permitting)
- Upload logos so that you can customise the look and feel
- Upload Proposals, Demonstration videos and/or quotations
- Upload User Guides, Training Materials and Webinar recordings
2. How to find the Media Library in Portalis?
- Log into your Portalis Admin Portal - https://[YOURCOMPANYNAME].portalis.io/admin/login
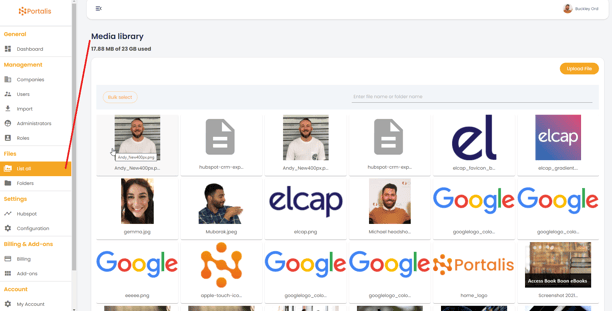
- Navigate to the Files section and click on 'List all'
The image below shows the Media Library in the Admin area of Portalis:
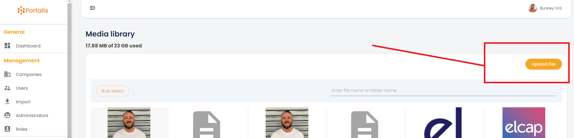
3. Step-by-step guide to importing content to the Media Library
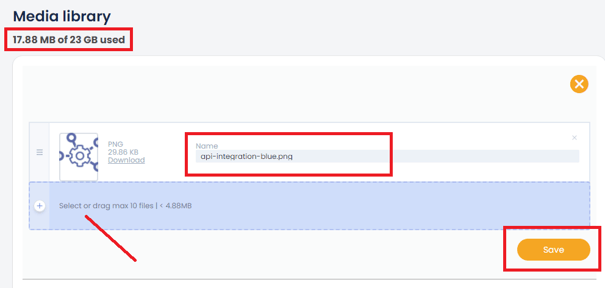
- Click on Upload File
- Choose your file(s) to upload, dont forget to review and edit the file name as required, and click Save.
- Once the files is saved, you can click on the uploaded file and choose your preferred Folder for it to be stored in.
If no Folders exist, then jump to step 4 to learn how to create folders for your files (below):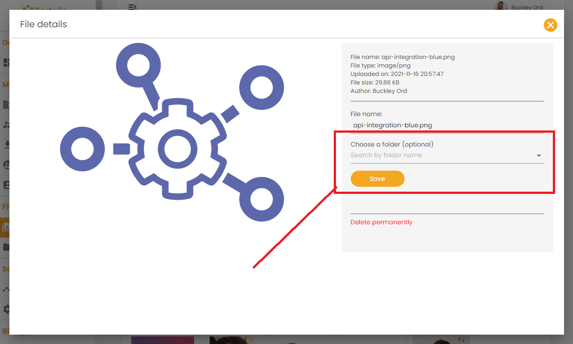
- Create Folders to help categorise files (optional step).
Authorised users can create folders/sub-folders easily, by entering the desired name and clicking Add: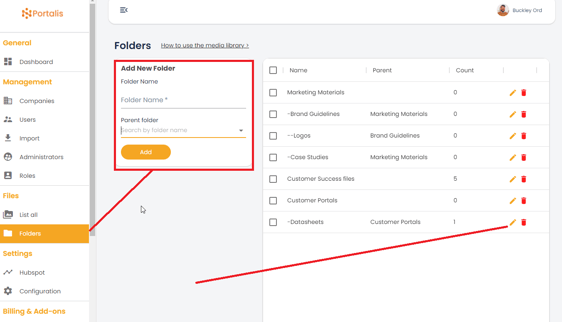
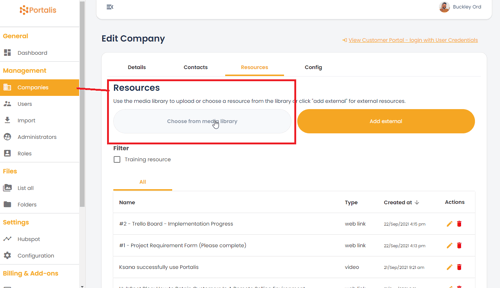
4. Add Media Library content into your Customer Portal(s)
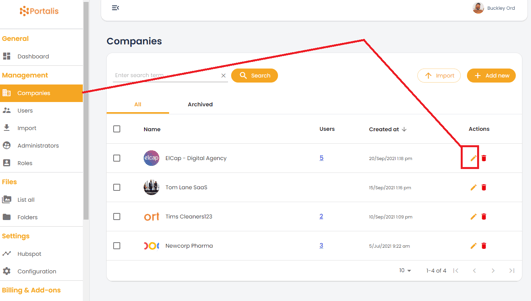
- The Companies tab in your Portalis Admin site is the home for each of your Customer Portals. Navigate to the Company that you would like to add the content to, click on the orange pencil (actions) to edit the contents and settings of that specific Portal:
- Navigate to Resources, click on Media Library and choose your files to upload to this specific Portal only.
- Choose the file type, whether this is a 'Training resource?' and/or whether to 'Notify Company?' (to send an email alert to the designated email address for this Customer Portal):
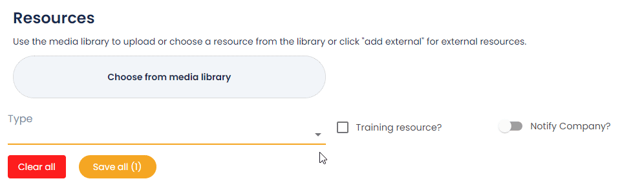
- Repeat steps 4 a-c to add multiple files, then click 'Save all'.
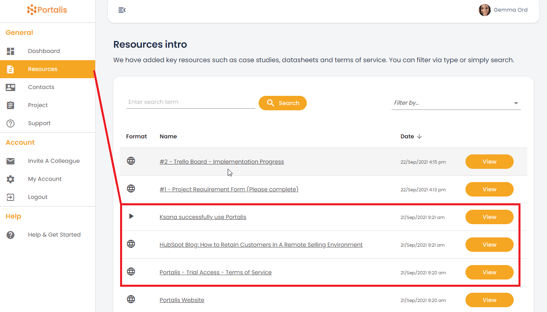
- This uploaded content will now be available to Contacts (Basic Users) in the Customer-facing Portal:
5. FAQs & Troubleshooting
- What file formats does Portalis support?
Most common file formats are supported, for example the typical Microsft Office files, PDF, video and image file formats. URLs are supported - so that you can link to 3rd party platforms such as Vimeo / YouTube etc.
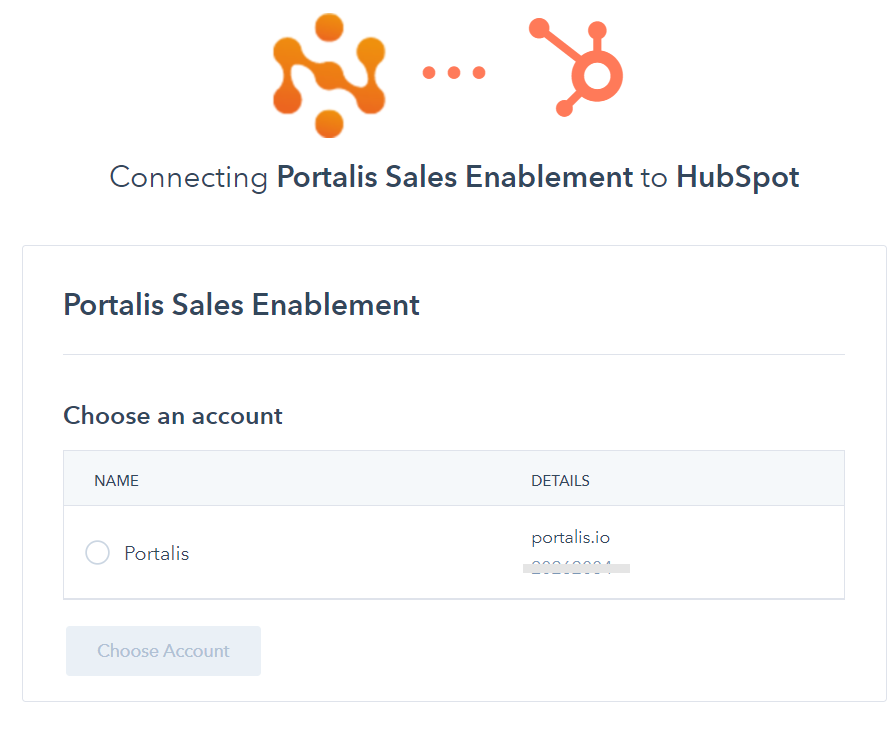
- Do uploaded files synchronise with HubSpot?
Uploaded files are not synchronised with your HubSpot system. You can upload URLs from HubSpot sales documents / files and maintain the 'master' document in your HubSpot account.
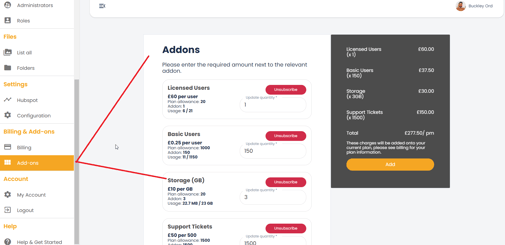
- How do storage limits and allocations work?
You Portalis subscription includes a reasonable amount of storage capacity to upload content to your Customer Portals. If you reach the storage limit, for example due to uploading lots of video files then you can buy more in the Add-ons section:
What to do next?
- Log into your Portalis Admin Portal - https://[YOURCOMPANYNAME].portalis.io/admin/login
- Navigate to the Files section, and get started!