This is part of a series of 'Getting started' posts to help you make the most of your Portalis Customer Portal system.
If you are not already a Portalis customer, get started for free
Tip#5 What's the difference between Licensed and Contact Users?
Portalis is available with two user types - 'Licensed', and 'Contact':
- 'Licensed' user - i.e. an internal, ‘your business’ user
- 'Contact' user - i.e. your lead / customer who has access to a portal that your team has created
An allocation of both 'Licensed' and 'Contact' users is included in your subscription, with different volumes depending on the plan.
This post explains the difference between user types and provides ideas on how to make the most of Portalis for everyone.
In this post:
- What is a 'Licensed' User?
- What is a 'Contact' Users?
- Step-by-step guide to creating a 'Licensed' user
- Managing a Licensed user (Administrator) - after they have been created
- Step-by-Step guide to creating a 'Contact' user
- Managing the Contact - after they have been created
- FAQs & Troubleshooting
1. What is a 'Licensed' user?
- A 'Licensed' user is one of your internal, ‘your business’ users can access the Admin page to create and customise portals for your customers.
- In the Portalis application, your 'Licensed' users are referred to as Administrators. They have a seperate log-in page to Contacts, and they control the content and settings of your Portalis system.
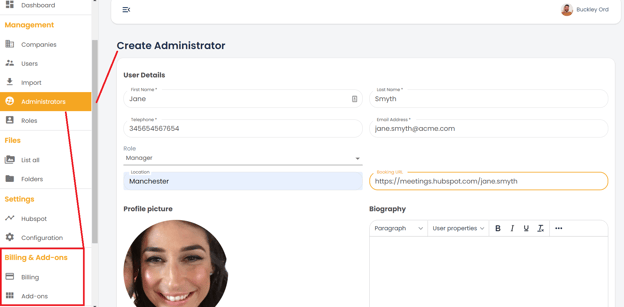
- One (1) Licensed user (Administrator) is included in the free plan. If you want to add more you can upgrade to the Starter or Pro plans via the Billings & Add-ons section of the Admin page:
- What can a 'Licensed' user do?
A non-exhaustive list:
-
- access the portalis admin area -https://[YOURCOMPANYNAME].portalis.io/admin/login
- create/edit/archive new portals for each customer
- create/edit/archive basic users i.e. your customer's users
- create/edit/archive organisations - i.e. your customer organisations
- create/edit/archive content to a customer portal
- activate notifications to portal users when a new document or piece of content is added
- create/edit/archive Basic users and other Administrator users
- manage configuration settings such as links to Trello / HubSpot calendar and more.
- view portal access requests (MQLs) from prospective users (email/via HubSpot)
- view analytics from Portalis directly in the HubSpot contact record
- control global settings such as custom branding, logos, page content and the HubSpot Support ticket integration.
2. What are 'Contact' users?
- A 'Contact' user is a 3rd party i.e. a lead or customer user who can use the customer log in page to access their secure portal.
- In the Portalis application, your 'Contacts' are listed underneath 'Companies' in the Management section of the Administrator site (see below).
- Multiple Contacts can be members of one Company portal.
- But a Contact cannot be a member of more than one Company portal.
- Ten (10) Contacts are included in the free plan. If you want to add more you can upgrade to the Starter or Pro plans via the Billings & Add-ons section of the Administrator site.
- What can a Contact do?
A non-exhaustive list:
-
- invite colleagues to access the portal
- reset their own password
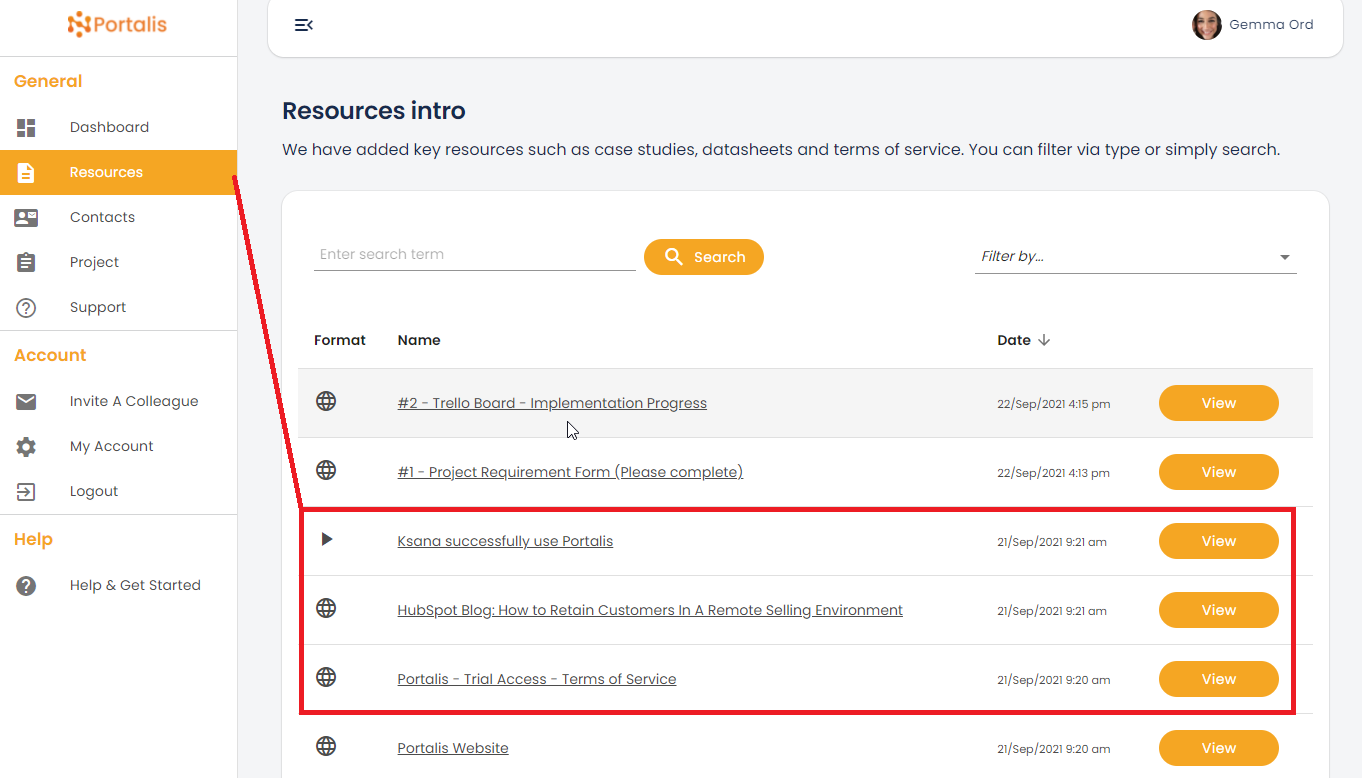
- engage with pre-loaded documents, videos, proposals etc within the portal
- request a call back or book a meeting with sales rep (HubSpot meetings)
- raise a support ticket, or view previously raised tickets (HubSpot Support)
- complete a customer checklist (HubSpot Form)
- access links to Trello, your help and knowledge base and other 3rd party support or learning tools
- engage with HubSpot Live chat / chatbot (if activated for your portal)
3. Step-by-step guide to creating a Licensed user.
- Log into the Administrator site.
- Navigate to the Administrators page in the Management section. You will see a list of existing Administrators (if there are any). One Administrator = One Licensed user.
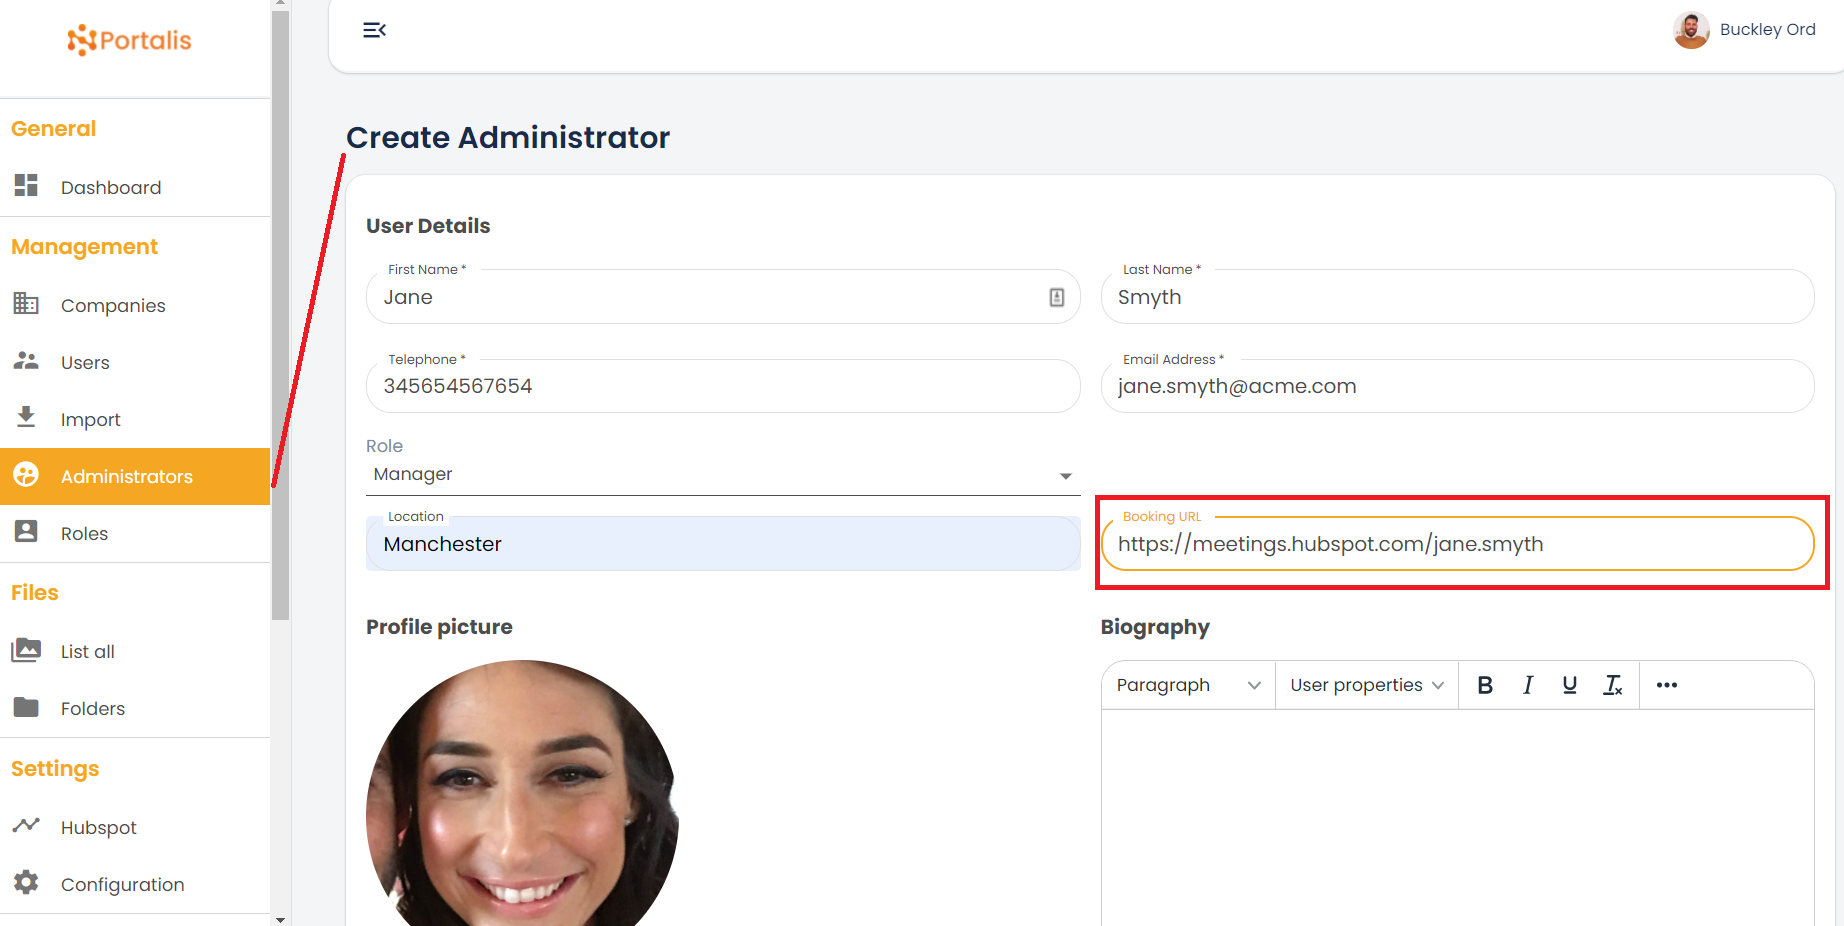
- Click +Add new to create a new Administrator - when you do you will be presented with this screen.

- Add the correct details for: First Name*, Last Name*, Telephone*, Email address* and Location. The fields marked with an asterix* are mandatory.
- Choose the correct Role from the drop-down list. Roles are linked to upcoming permissions functionality and can be created in the Roles page in the Management section. Learn how to create Roles here.
- Add a profile picture, or leave it for the user to add one themselves when they log in. The picture is used in thumbnails across the Portalis site.
- Add your HubSpot Meeting Booking URL. This provides the ability to book a meeting directly into the calendar of this particular Licensed / Administrator user.
- If you dont have one already, refer to this article to create a HubSpot Booking URL look at this help article (external article on the HubSpot support page).
An example Customer Portal with HubSpot meeting embedded: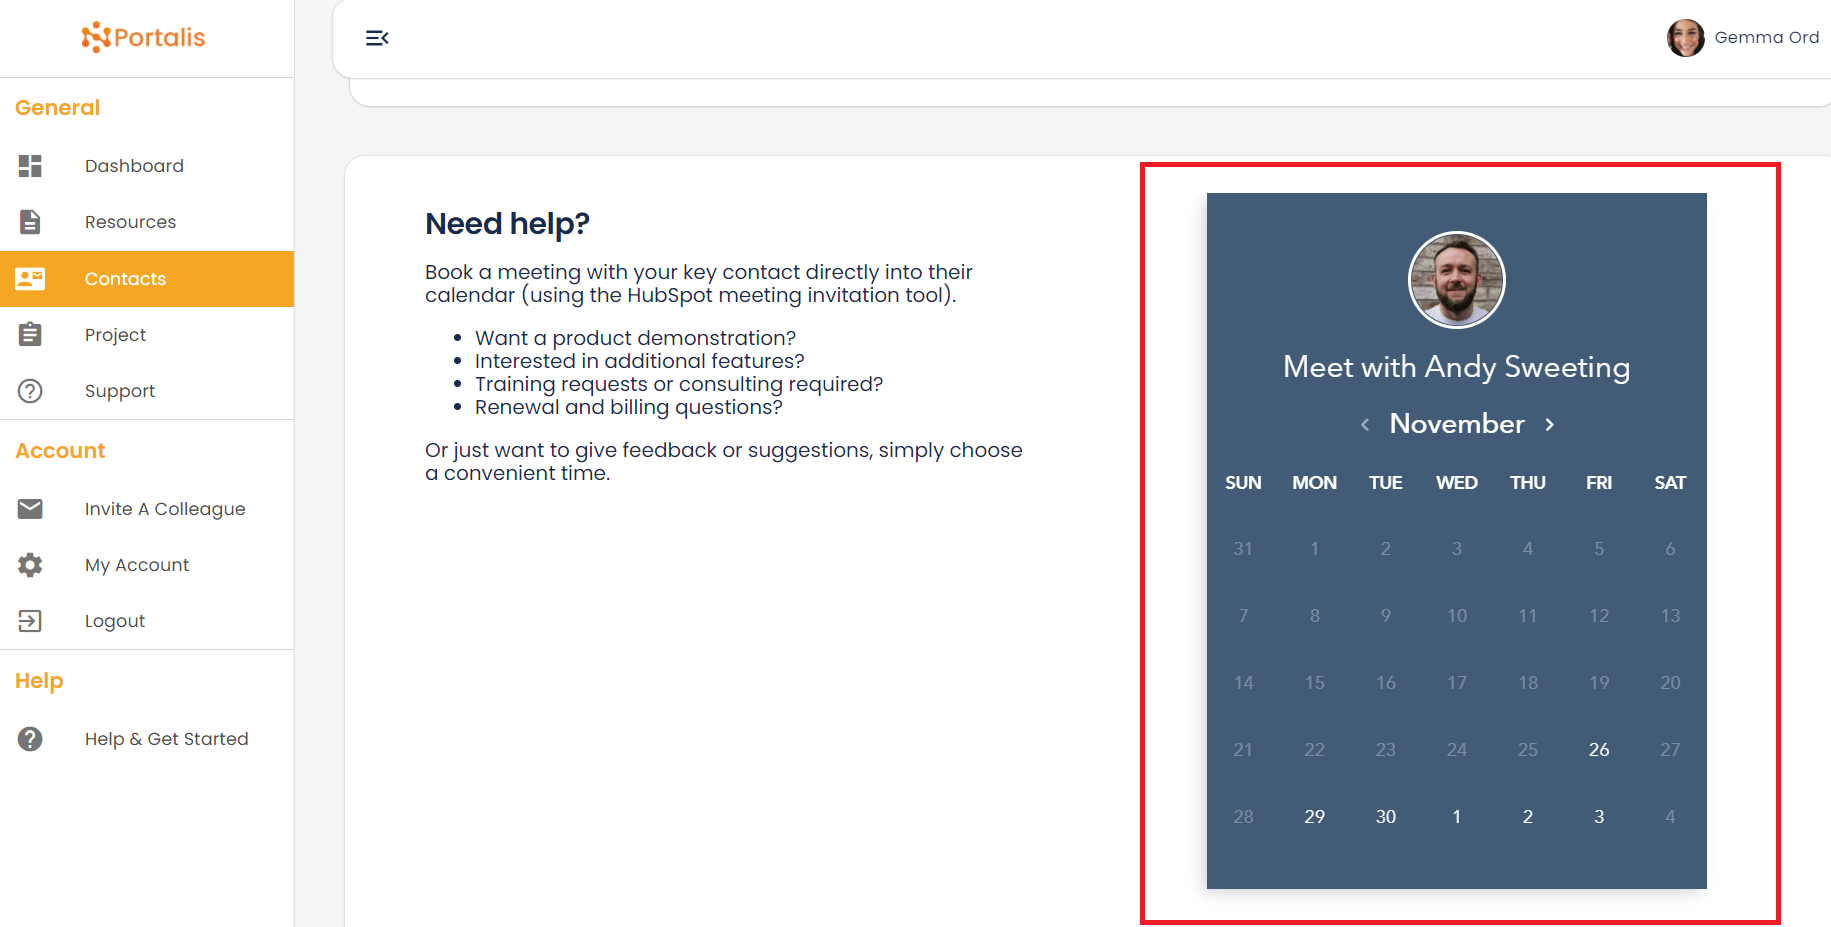
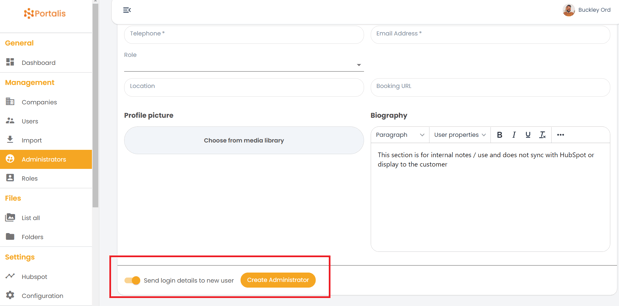
- (optional step): Use the Biography field to add any internal notes about this particular user that may be helpful for the Adminstrators - such as their requirements / project priorites. This field is for internal use only is not presented in the Customer Portal (or anywhere else).
- Toggle the orange switch to choose whether to send log-in details to the new user as soon as you click the Create Adminstrator orange button. There may be occasions where you want to create lots of Administrators but only give them access after the configuration of Portalis is complete and you are ready to train them. If that is the case you can toggle the alert to the off mode (see below)
- And that's it! the Administrator (Licensed user) is created!
4. Tips for managing a Licensed user (Administrator) once it has been created:
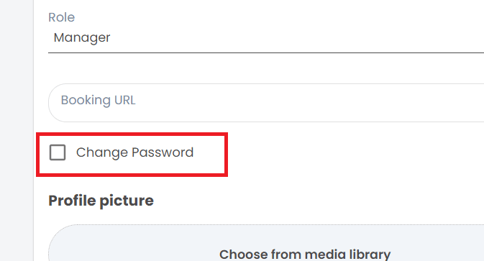
- You can change the password of Administrators after they have been created by accessing their name on the list and clicking the Change Password square button.
- To archive an Administrator, simply click the red Dustbin icon on the Administrator list screen next to their name. Archived users can be reinstated (if license limits allow).

- Note: Portalis will notify you to upgrade or add user licenses if you have reached your limit. In this scenario you will not be able to add more users until you have visited the Billings & Add-ons section to upgrade.
5.Step-by-step guide to creating a new Contact
Portalis enables you to create single Contact users and/or bulk import users from a spreadsheet.This posts explains how to create a single Contact user, if you want to learn how to import users from your HubSpot CRM (or other) then read: Tip #4 - Bulk importing your Companies & Contacts.
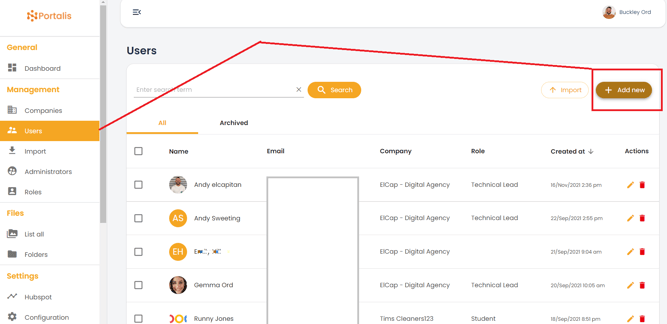
- Navigate to the Contacts page in the Management section.
- You will see a list of existing Contacts (if there are any). Click +Add new to create a new Contact
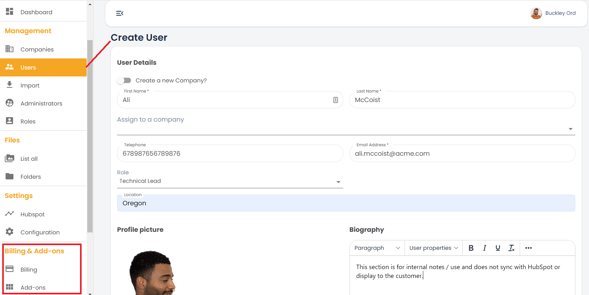
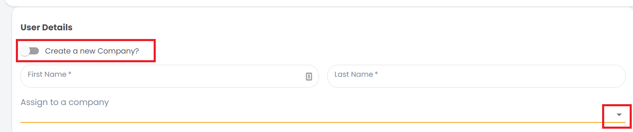
- Add the correct details for: First Name*, Last Name*, Telephone, Email address* and Location. The fields marked with an asterix* are mandatory.
- Choose the correct Role from the drop-down list. Roles are linked to upcoming permissions functionality and can be created in the Roles page in the Management section. Learn how to create Roles here.
- If the Company already exists you can choose from the drop down list to make this Contact a member of that specific Company portal. If no Company yet exists for this Contact then you can create a new Company 'on the fly' - see red box below:
- Add a profile picture, or leave it for the user to add one themselves when they log in. The picture is used in thumbnails across the Portalis site.
- (optional step): Use the Biography field to add any internal notes about this particular user that may be helpful for the Adminstrators - such as their requirements / project priorites. This field is for internal use only is not presented in the Customer Portal (or anywhere else).
- Toggle the orange switch to choose whether to send log-in details to the new user as soon as you click the Create Contact orange button. There may be occasions where you want to create lots of Contacts but only give them access after the configuration of Portalis is complete. If that is the case you can toggle the alert to the off mode (see below)
Toggle off - Portalis will not send login credentials to the user at this time (this can be sent later)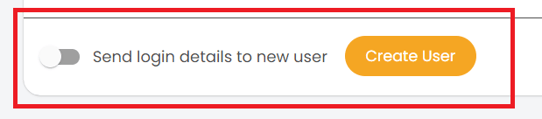
Toggle on - Portalis will send login credentials to the user via email at the point of clicking create contact.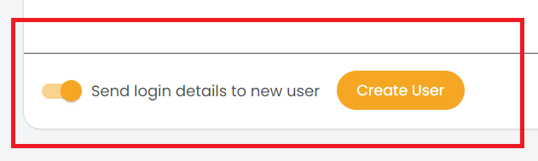
- And that's it! the Contact is created!
6. Tips for managing the Contact - after they have been created:
- You can change the password of Contacts after they have been created by accessing their name on the list and clicking the Change Password square button. In addition, the user can change their own password via the sign-in page in the normal way.
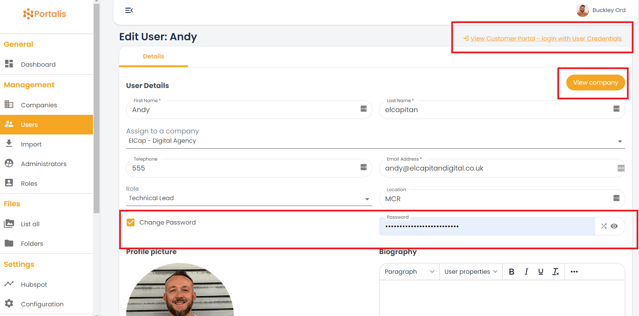
- Once the Contact is created, you can view the Company for whom the Contact is assigned by clicking on the Orange 'View Company' button on the top right.
- The Contact can be re-assigned to a different company by choosing a different company from the drop-down 'Assign to a company' and hitting save.
- To view the Customer Portal for this user click on the 'View Customer Portal -login with their User Credentials' on the top right hand side of the screen. This will give you a view of their 'end-user' experience of the portal that you are managing and creating for them.
- To archive a Contact, simply click the red Dustbin icon on the Contact list screen next to their name. Archived users can be reinstated (if license limits allow).
- Note: Portalis will notify you to upgrade or add user licenses if you have reached your limit. In this scenario you will not be able to add more users until you have visited the Billings & Add-ons section to upgrade.
7. FAQs & Troubleshooting
- What are Roles in Portalis?
- Portalis allows you to create/edit/delete your own Role types and tag users with their specific Role. For example, Technical user, Researcher, Manager - whatever you like. Simply go to the Roles section in the Admin site to create the Roles that your organisation wants to use.
- Useful point: Role information is pushed to HubSpot (if you have a corresponding custom property) so that you can utilise HubSpot automation for targeted campaigns etc.
- Note: In the future, Portalis intends to expand Roles functionality to incorporate permissions controls for both Contacts and Administrator user types. This is not available today, but is a high priority item.
- Do uploaded Contacts synchronise with HubSpot?
- Yes, everything in a Contact users profile (except the Biography section) is synchronised with HubSpot
- This provides powerful insights about behaviour and intent - directly within the HubSpot CRM contact record.
- For more information, read this getting started: Tip#2-Connecting your HubSpot to Portalis
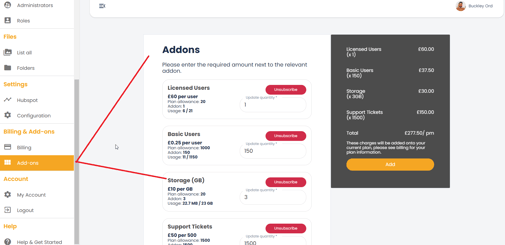
- How do storage limits and allocations work?
- You Portalis subscription includes a reasonable amount of storage capacity to upload content to your Customer Portals. If you reach the storage limit, for example due to uploading lots of video files then you can buy more in the Add-ons section:
- What to do next?
- Log into your Portalis Admin Portal - https://[YOURCOMPANYNAME].portalis.io/admin/login
- Navigate to the Contacts and Administrator sections, and get started!